Mozilla Thunderbird email is a free email client software through which you can send / receive from your domain email accounts. It’s easy to setup and use with great features on your desktops.
You can download Mozilla Thunderbird email client from Mozilla Website
Here are the requirements you need to check before installing it on your desktop.
Mozilla Thunderbird Requirements:
- Windows: Windows XP, Windows Server 2003 or later
- Mac: Mac OS X 10.9 or later
- Linux: GTK+ 3.4 or higher
After Thunderbird installation, you need to configure email account, which you have created on your domain name through cPanel.
To configure an email account, you will need to have the following details.
Incoming mail server and port (for example, "pop.example.com" and port 110 or "imap.example.com" and port 143)
Outgoing mail server and port (for example, "smtp.example.com" and port 25)
Security setting for the connection with the server (for example, "STARTTLS" or "SSL/TLS" and whether or not to use secure authentication)
Mozilla Thunderbird Email Configuration
Step 1 : Open the Account Settings under Tools > Account Settings. Each email or newsgroup account that has already been configured is listed on the left side of the Account Settings dialog. These accounts correspond to the top-level folders displayed in the Folders list.
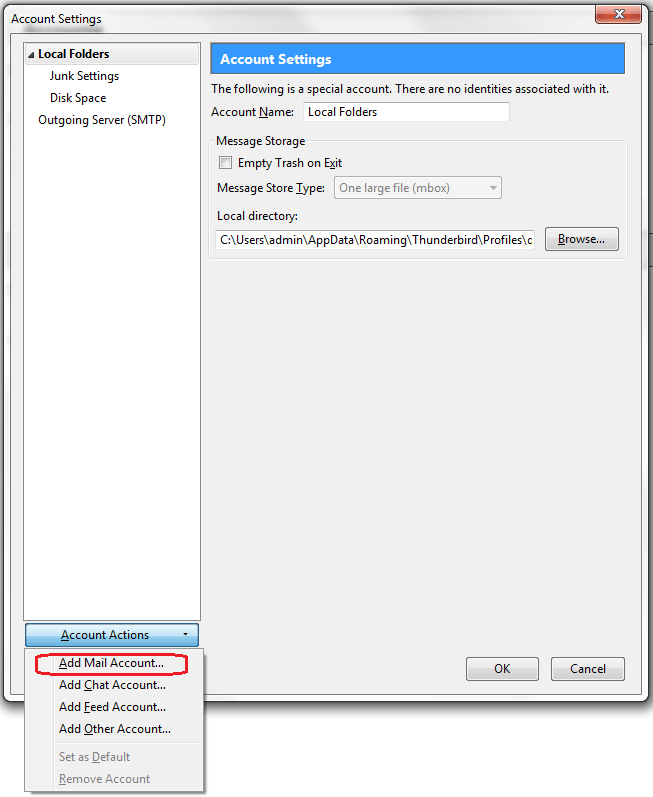
Step 2: Click the Account Actions button and select Add Mail Account
Step 3: Enter your email account, password and press Continue. Thunderbird will try to fetch your email account settings based on the domain portion of your email address
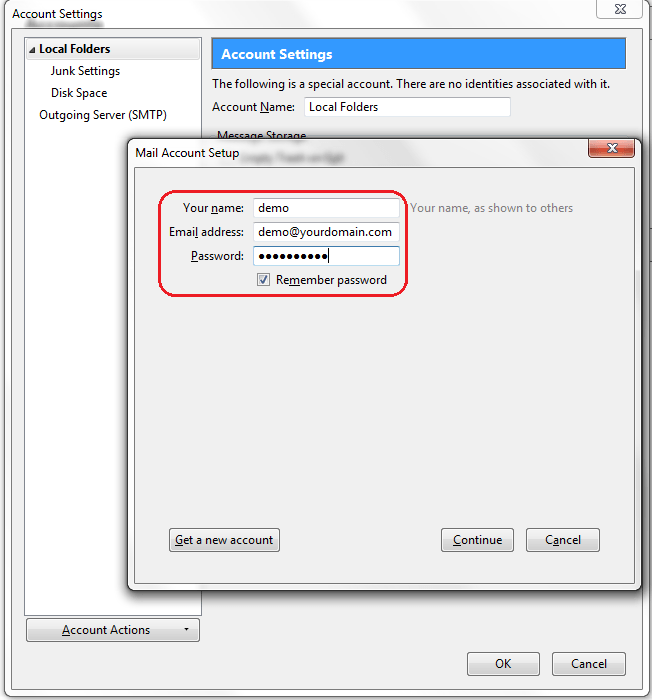
Your Name: the name you would like the recipients of your emails to see
E-Mail Address: your full Private Email address
Password: password for your Private Email account.
Here, you can stop automatic configuration if you want to provide the server names, port and IMAP/POP details to setup the account manually.
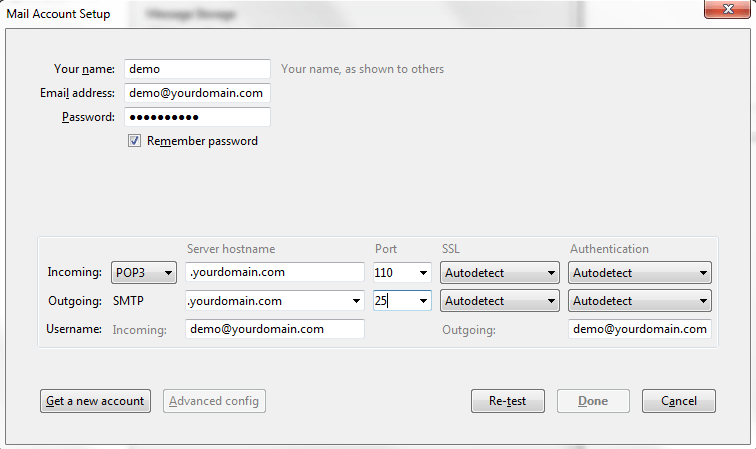
Step 4: In this step, you need to configure outgoing mail server for your email account. Usually, the hosting provider uses the same server for both incoming and as well as outgoing.
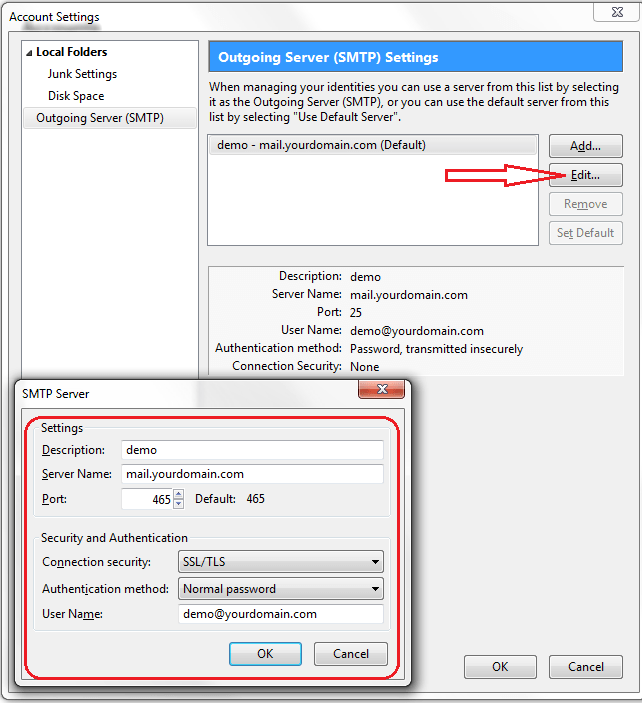
In the Account Settings dialog, in the left pane, select Outgoing Server (SMTP) from the bottom of the list. Either edit that entry or add a new entry.
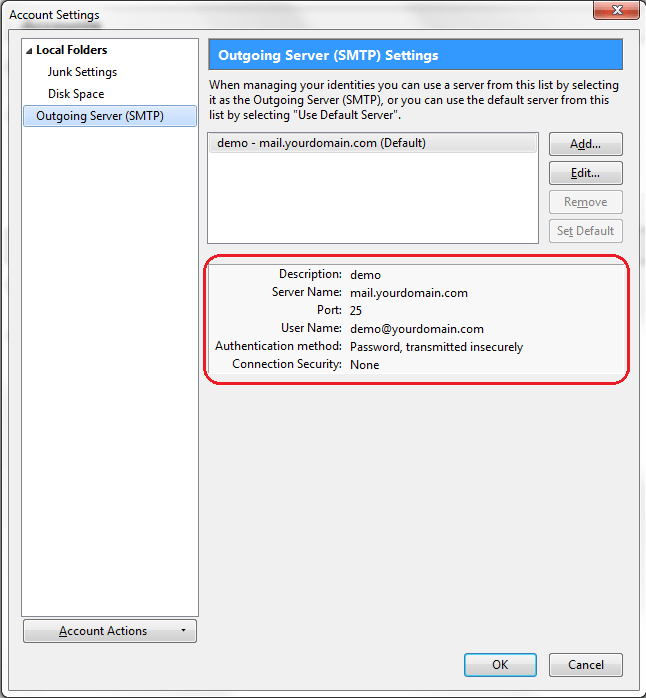
Configure outgoing mail server with port and security.
After saving the information about the new outgoing server, select your new email account from the list. In the Outgoing Server (SMTP) field, select the SMTP server from the drop-down list.
Step 5: After saving these changes you should be able to send and receive emails.
That's it! You should be up and running to send or receive emails from Thunderbird Email client.
We'd love to hear feedback on this article. Please give your valuable feedback and help us to improve.
