In this guide, you’ll learn how to create email account in Mac Mail application using FastWebHost email hosting services.
To setup email account in Mac, first you need to create email account for your domain through hosting control panel ( cPanel ). You can find walk through instructions in our email hosting guides.
Let’s dive in to create or setup email account on your Mac.
Adding email account - Mac Mail
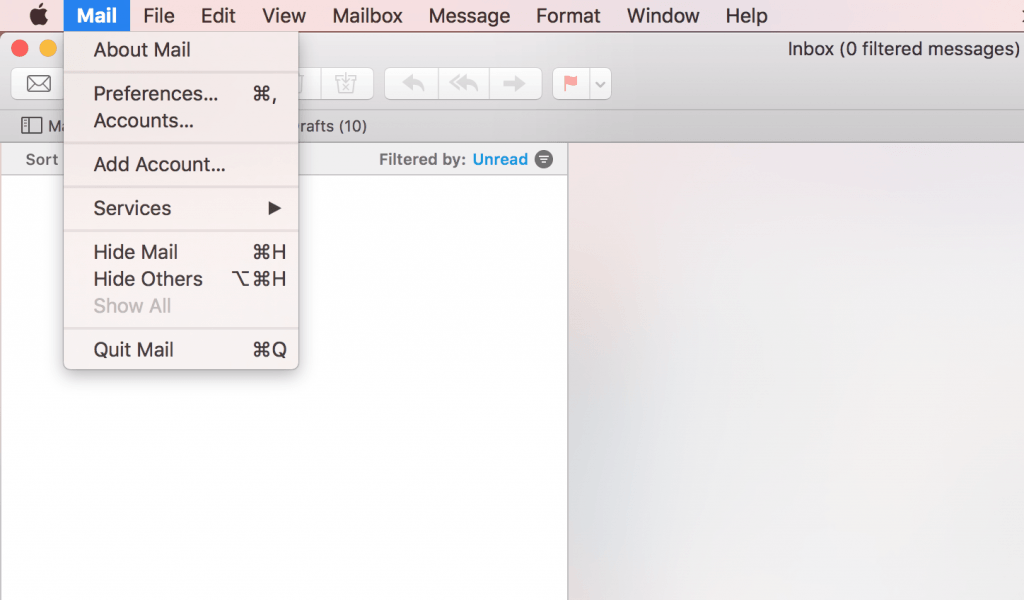
Launch Mac mail application from the application bar.
Select Preferences from the Mail menu.

Click on the Accounts tab

Then on the accounts tab, click the + sign

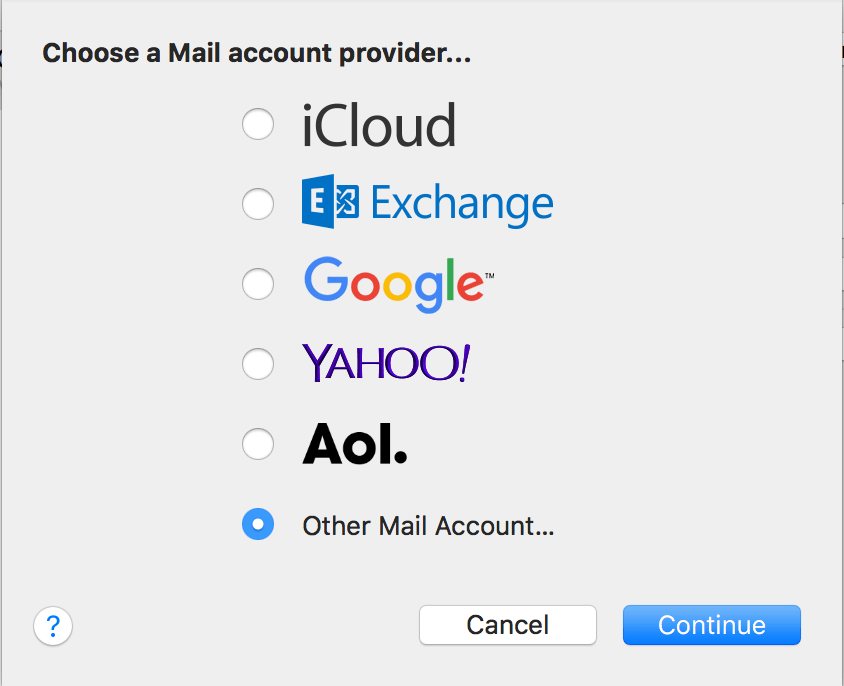
Here, you'll see mail account provider options list. Select Other Mail Account option from the list and hit Continue button.

Next, select Mail account on next screen.
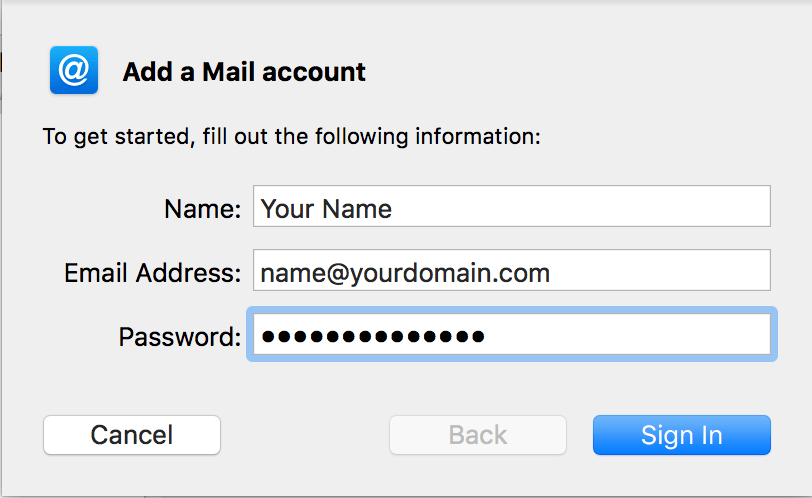
Then, you'll be presented with new window with Add a Mail account.

Fill out your name, email account you created in cPanel Hosting panel earlier and email password.
Then hit Sign In button.

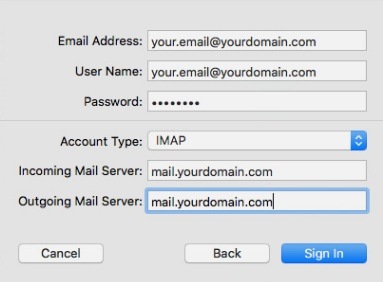
Make sure to fill in the server settings for your email account
Email Account Details
- Email Address - Email address you have created in cPanel Hosting panel
- Username - Enter full email address as username.
- Password - enter the password for your email account;
- Account Type: - Set it to IMAP by default. Unless you specifically want to use POP3. IMAP is recommended if you will be using this email account with multiple devices since they will all synchronize.
- Incoming Mail Server - add mail.yourdomain.com as your incoming mail server name
- Outgoing Mail Server - Should be same as incoming mail server. i.e mail.yourdomain.com
Note: POP3 will download and remove all of the emails from our server, whereas IMAP will synchronize the emails between your email client(s) and our server.
Once you enter all the details, press Sign In to finish email setup procedure.
Now, you should be up and running with emails on Mac using Mail application
